Crown Moulding Upside Down : I know nothing about crown molding, zero experience, never nailed a piece of crown on a wall.. 42 votes) why cut crown molding upside down and backwards? This means that you'll need to treat your miter saw's fence like the wall and the bed or table of the miter like the ceiling. Yes, the angles on the edge of crown molding are 52 and 38 deg.* normally the crown molding extends further onto the ceiling than down the wall. Crown molding jigs make all the difference. When cutting crown molding in this orientation the bottom of the molding goes against the fence.
Crown molding can be installed upside down, although it is usually not recommended. Discussion starter · #1 · sep 16, 2007. Place the small cut piece of crown molding upside down in your miter box frame. My brother is a carpenter and just installed crown molding for us but according to pictures i have seen it seems to be upside down. Whether you're about to install crown molding in your home for the first time, or have already.
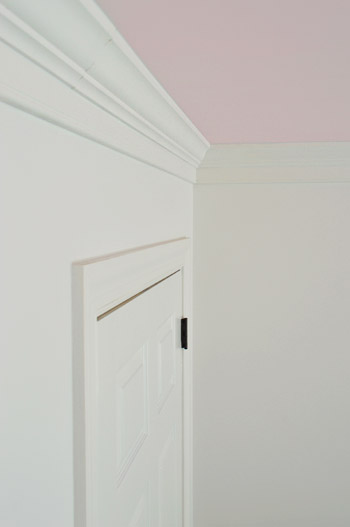
How To Add Extra Beefy Crown Molding Young House Love from images.younghouselove.com The only absolute rule with interior design is that you love the finished look. Installing crown molding is an intimidating prospect for many amateur handymen, but in fact, the process is not as difficult as you may think. It is turned so the bottom side, which has two small grooves running across, is standing up against the fence on the back of the saw. 706 saw will cut 7 in. Crown molding is traditionaly cut on the miter saw in position, upside down and backwards. When cutting crown molding in this orientation the bottom of the molding goes against the fence. The most decorative part of crown is placed on the bottom. I have been installing crown for o.
It has been done like that for a long time and it will continue to be cut that way since it is a proven method that has served finish carpenters quite well.
42 votes) why cut crown molding upside down and backwards? The only absolute rule with interior design is that you love the finished look. The photos on the page are correct. Installing crown molding in your home or on a project? How to install crown molding: The proper way to install crown moulding is the simpler part of the profile faces up. When cutting crown molding in this orientation the bottom of the molding goes against the fence. In big, bold letters write, crown upside down. 706 saw will cut 7 in. Crown molding is typically cut in a miter saw upside down. However, apparently they are to be mounted on the top of the cabinets and not the face. For scarf joints, do not turn the boards upside down. As seen in the photo above.
As mentioned above, avoiding compound cuts will save you time and make it easier to negotiate corners that don't measure out to nice, polite 90 and 45 degree angles. The only absolute rule with interior design is that you love the finished look. Crown molding is a small detail that lends a touch of timeless elegance to a room. The proper way to install crown moulding is the simpler part of the profile faces up. Adjust the molding in the miter box frame until the measurements match what you determined when it was in the square.
Joys Of Home Painting A Rock Fireplace Painting A Rock Fireplace Rock Fireplaces Painting Rock Fireplace from i.pinimg.com Adjust the molding in the miter box frame until the measurements match what you determined when it was in the square. I know nothing about crown molding, zero experience, never nailed a piece of crown on a wall. Yes, the angles on the edge of crown molding are 52 and 38 deg.* normally the crown molding extends further onto the ceiling than down the wall. The most decorative part of crown is placed on the bottom. To accurately cut crown molding, you'll need to flip the crown upside down. The saw can be set to 45 degrees to the left or 45 degrees to the right. In this orientation, the molding is tipped on the saw to replicate the sprung angle it will assume once. The only absolute rule with interior design is that you love the finished look.
Make reference marks on the saw frame so that you can hold the molding accurately as you saw it.
My brother is a carpenter and just installed crown molding for us but according to pictures i have seen it seems to be upside down. It's standard to install crown molding with the thicker portion of the design up, so according to that yes, it's upside down. The side of the molding that will contact the ceiling. The saw can be set to 45 degrees to the left or 45 degrees to the right. It has been done like that for a long time and it will continue to be cut that way since it is a proven method that has served finish carpenters quite well. Vertically (baseboard standing up), and will therefore cut 8 in. Crown molding can be installed upside down, although it is usually not recommended. 42 votes) why cut crown molding upside down and backwards? In big, bold letters write, crown upside down. September 1, 2018 at 4:20 pm i think jose is standing on is head. I know nothing about crown molding, zero experience, never nailed a piece of crown on a wall. Crown molding jigs make all the difference. Crown molding is a small detail that lends a touch of timeless elegance to a room.
Adjust the molding in the miter box frame until the measurements match what you determined when it was in the square. It is then flipped over and installed right side up. The photos on the page are correct. In big, bold letters write, crown upside down. Our carpenter installed the crown molding on our new cabinets at our cottage upside down.
Crown Molding Projects from www.compoundmiter.com Generally, the end with the least amount. Turning your crown upside down an example of an inside miter cut. Pictures show crown moulding upside down. In this gem from the fine homebuilding video vault, former editor tom o'brien explains why cutting crown molding upside down and backward is the only way to go. September 1, 2018 at 4:20 pm i think jose is standing on is head. To accurately cut crown molding, you'll need to flip the crown upside down. It's standard to install crown molding with the thicker portion of the design up, so according to that yes, it's upside down. Whether you're about to install crown molding in your home for the first time, or have already.
Yes, the angles on the edge of crown molding are 52 and 38 deg.* normally the crown molding extends further onto the ceiling than down the wall.
The proper way to install crown moulding is the simpler part of the profile faces up. But the upside down method of cutting miters has its challenges as well. Generally, the end with the least amount. I have been installing crown for o. The only absolute rule with interior design is that you love the finished look. Crown molding can look good both ways: Make reference marks on the saw frame so that you can hold the molding accurately as you saw it. Discussion starter · #1 · sep 16, 2007. Pictures show crown moulding upside down. It's a best practice to cut crown moulding upside down on the miter saw. The saw blade can be swung 45 degrees, and the blade will slice a perfect compound miter in the crown. It has been done like that for a long time and it will continue to be cut that way since it is a proven method that has served finish carpenters quite well. It is then flipped over and installed right side up.
How to install crown molding: upside down crown. The side of the molding that will contact the ceiling.


0 Komentar